Collection: Create Custom Watercolor Table Decor For Your Next Party or Holiday
DIY watercolor table decor is a warm and creative way to personalize your party, holiday, or event. You don’t have to be a watercolor pro to create these stylish place cards and menus.

Setting the table with DIY place cards and menus adds color and personality to a sit down dinner. The watercolor place cards indicate to guests where to sit at the table. They also look great and add a fun element to the party.
But think outside the table too.
If your party is ‘serve yourself’ style or a potluck, the place cards can be used to identify the different foods on the table or counter. They can also call out the foods that contain gluten, dairy, peanuts, or other dietary concerns to your guests.

Create watercolor menus for each place setting to let your guests know what you’re serving for dinner. You can personalize each menu with individual messages, quotes, or announcements.
If you’re new to watercolor, you can try a basic technique like graded wash. If you’re comfortable with watercolor pans - go crazy! You can try various paper sizes, watercolor techniques, and different colors based on the theme of the party.
SUPPLIES
- 6” x 9” - 140lb watercolor paper for menu
- 3” x 4.5” - 140lb watercolor paper for place cards
- Artists tape
- Ruler or measuring tape
- Water brush set
- Watercolor half pans set
- Watercolor pens
PREP
Cover workspace with paper or waterproof covering.
INSTRUCTIONS
Place Cards
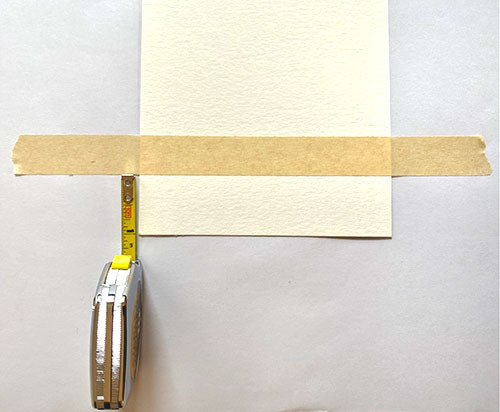
- On the 3” x 4.5” card of watercolor paper, measure 1” from the bottom edge. Apply a strip of artist tape 1” from the bottom of the paper. Press the tape down to avoid water seeping through the sides.

- Use a clean water brush to lightly dampen the entire place card with water; this helps the fibers from expanding when you start painting.

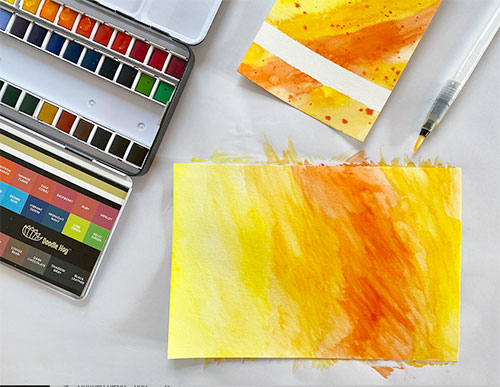
- Open the watercolor half pans and fill your water brush. Begin painting the place card with the watercolors and technique of your choice. You can paint over the artist tape. Have fun and play with designs and colors. There’s no wrong way to watercolor!

- Repeat Steps 1 -3 with each place card that you plan to make. You can paint them using the same colors but with varying techniques. Once all place cards are painted, lay them flat to dry.
- Once dry, slowly remove the artist tape on each place card. Once the tape is removed, fold each paper cross-wide so they’re shaped like tents.

- Choose a Watercolor pen and begin writing the name of each guest in the blank strip on each place card. Let dry completely.

Menu
Lay your 6” x 9” paper down. Use a clean water brush to lightly dampen the entire paper with water.Use your watercolor half pans and water brush to paint the menu. Keep your place cards near so you can paint the menus to match the place cards.

Repeat Steps 1 -3 with each menu card that you plan to make. Once all menus are painted, lay them flat to dry.
Choose a dark Watercolor pen color that will show up on the menu and write the planned dinner. When they’re dry you can embellish them with ribbon or stickers.
Now you’re ready to set the table with custom watercolor place cards and menus!

We can’t wait to see the designs of your watercolor place cards and menus . Don’t forget to use the hashtag #doodlehog when you post photos on social media.
Happy Watercoloring,
♥ The Doodle Hog Team
